tl;dr
- when you probably really need Electron
- how to integrate Webpack with Electron
- develop (and test) browser and Electron app
- Electron vs. system-wide node.js
OMG, another Electron freak!
Yeah yeah, I hear you saying Why don’t you learn Swift/C#/C++/…, Electron is so much memory intensive etc. I know you’re there, Electron haters. Well, in my opinion it’s super convenient to develop web application and have a possibility to run it inside Electron (with a great advantage—access to underlying node.js). Personally, it’s been thrilling to communicate with node.js from Electron (I’m kind of passionate developer). Sure, you can feel no Electron app is native, but that’s what trade-off is about.
When you may need Electron
A simple rule: if your project has a node.js dependency (meaning, the dependency is working only in node.js environment, not in a browser), you need Electron. What Electron basically does is running your Javascript in Chromium with node.js environment. Imagine you can do your usual front-end stuff and also you can control for example serial port (or USB port) peripherals in the same fashion, in the same project, even in the same file.
Goal
I’ll show you how to communicate with serialport device from your Electron app. First, we’ll create a project and install dependencies. Then Webpack needs to be configured. After this step we can finally run the app. The demo project will be fully functional in Electron and will gracefully degrade in a browser.
Prerequisites and project structure
Install node.js with npm and Electron. MacOS and Linux is OK, Windows should be supported too.
1 2 3 4 5 6 7 8 9 10 11 12 | |
Actual app code is inside app.js; we will write some tests in app.test.js; built bundle inside build directory; Electron main file is index.electron.js; our webpage index file is index.html; package.json contains list of dependencies and scripts; into release-builds we will pack whole Electron ready for distribution (in the next article); and finally webpack.config.js serves as Webpack config file.
Paste this into package.json and run npm install:
1 2 3 4 5 6 7 8 9 10 11 12 13 14 15 16 | |
Let’s start with Webpack
Paste this into webpack.config.js:
1 2 3 4 5 6 7 8 9 10 11 12 13 14 15 16 17 18 19 20 21 22 23 24 | |
You probably already know Webpack. What’s critical in configuration below is target option.
You need to set target to electron-renderer if you’re building code for Electron. Long story short—this setting will enable node.js and browser environment in your bundle.
Also notice process.env.IS_ELECTRON definition. This way we can easily execute parts of javascript in Electron only.
Develop
app.js, index.html and index.electron.js code looks like this:
1 2 3 4 5 6 7 8 | |
Notice the if clause; the code inside the clause will be executed only if the bundle was built for Electron environment.
1 2 3 4 5 6 7 8 9 10 11 | |
1 2 3 4 5 6 7 8 9 10 11 12 13 14 15 16 17 18 19 20 21 22 23 24 25 26 | |
There’s nothing special in index.html. index.electron.js is (almost) a vanilla Electron configuration.
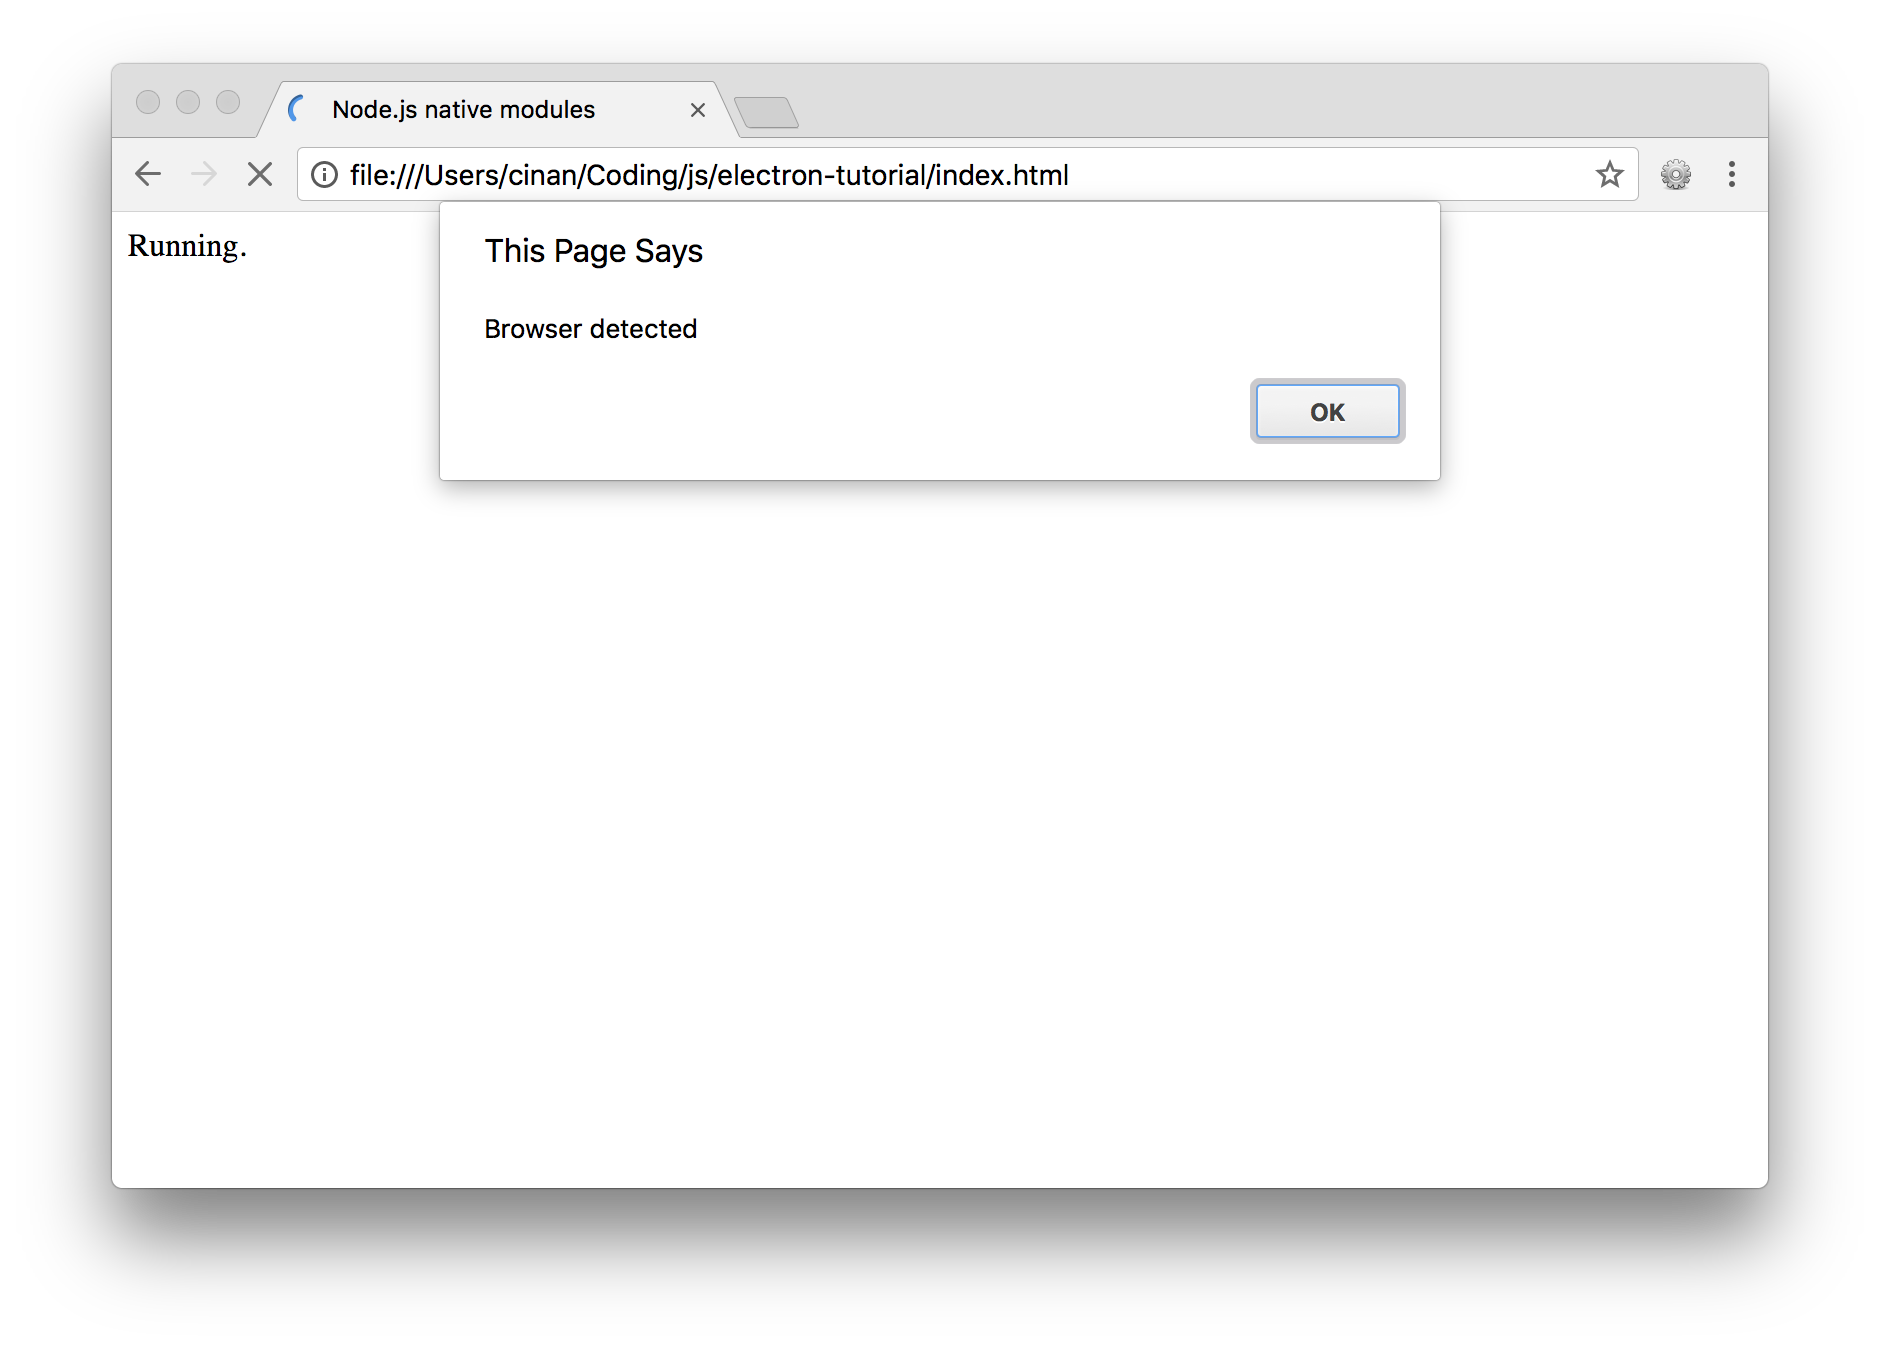
All right, run Webpack with npm run build and open index.html in your browser (e.g. file:///Users/joedoe/electron/index.html). You should see something like on the screenshot below.
 Browser screenshot
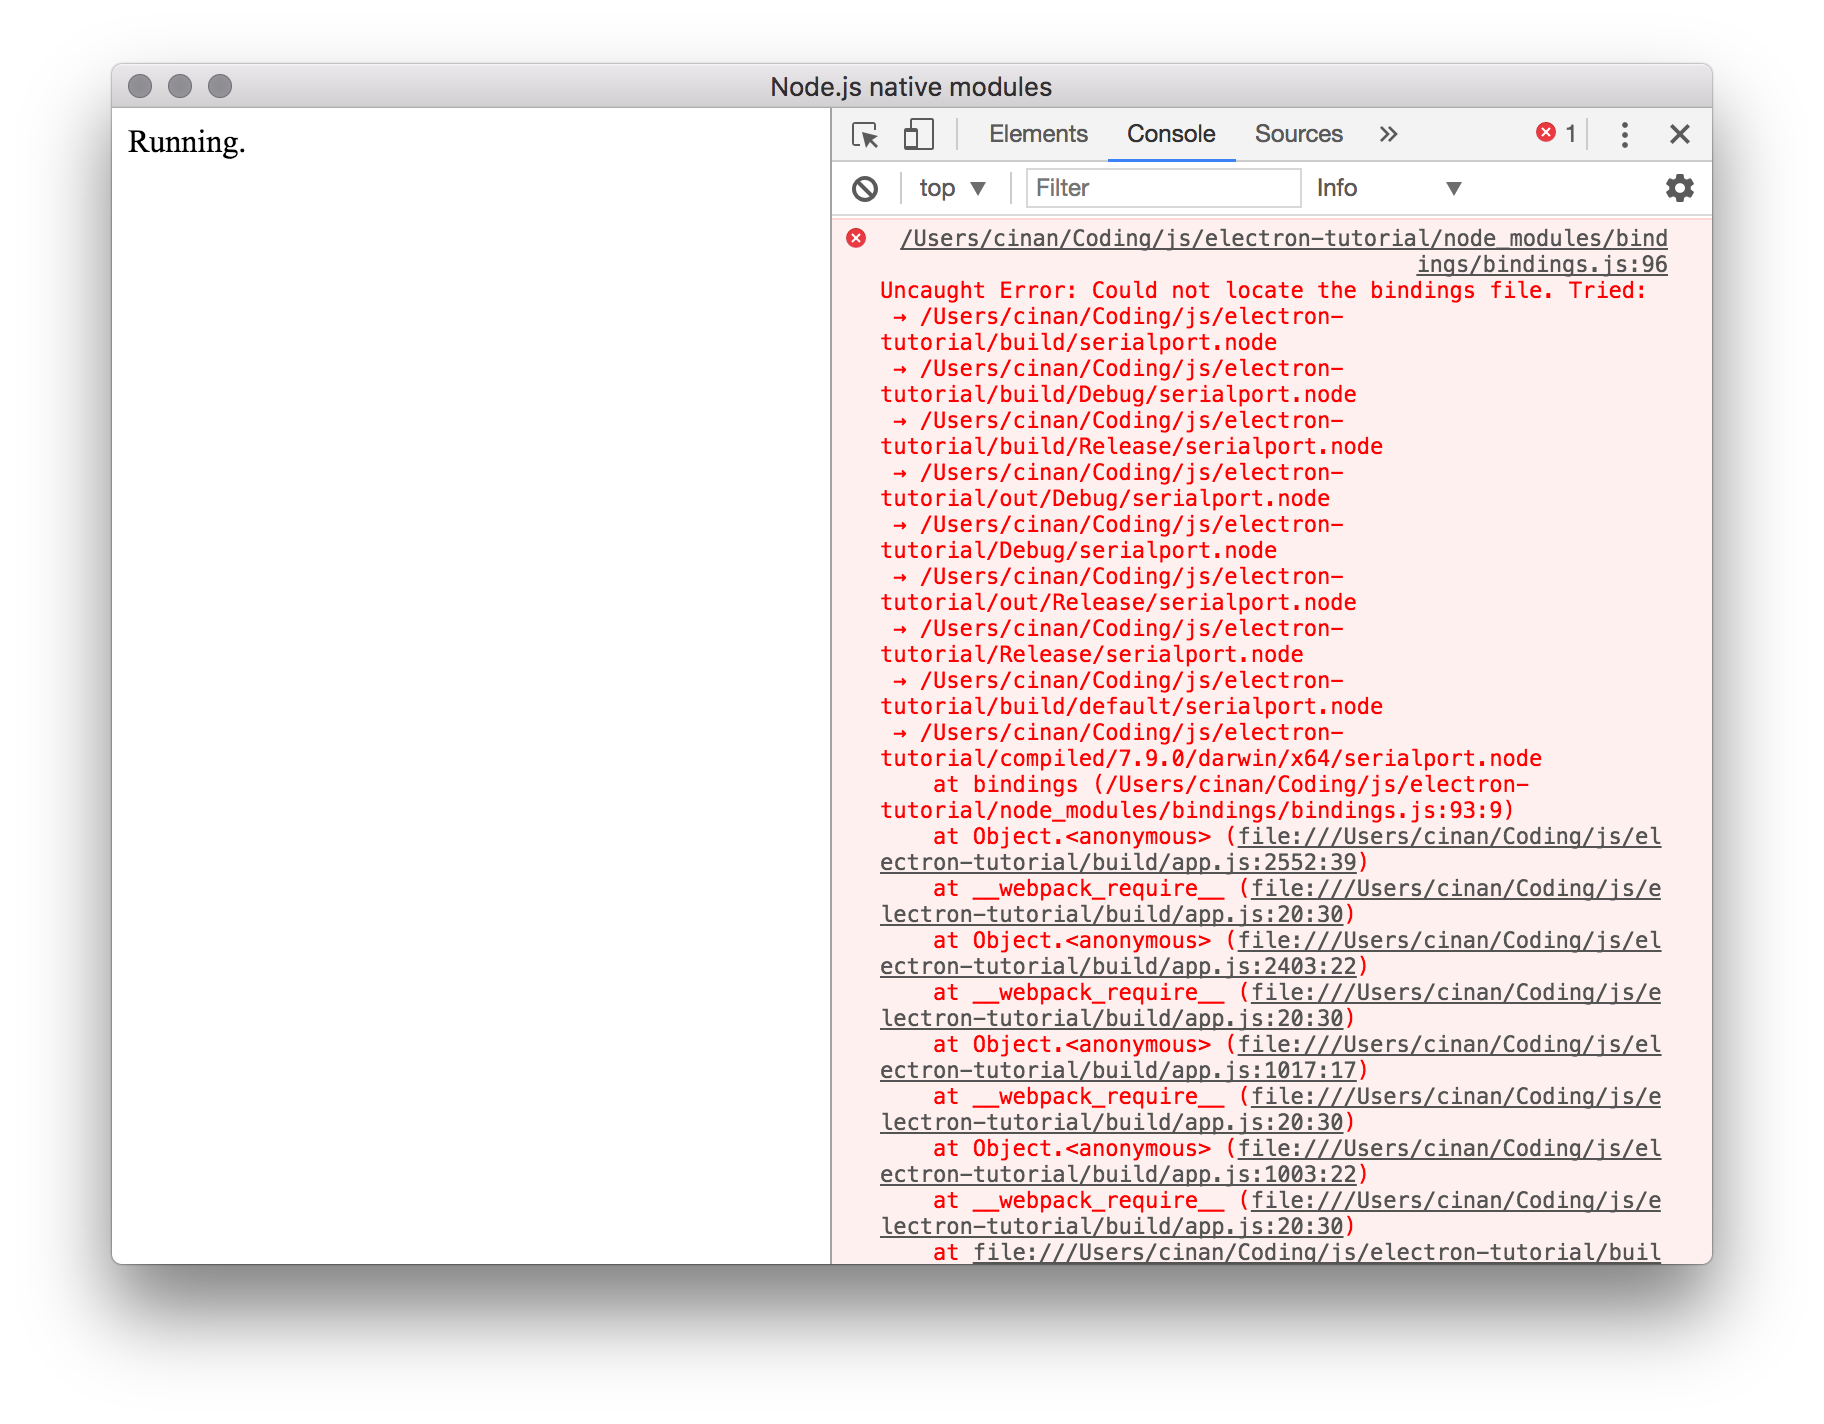
Now run Webpack in Electron mode: PLATFORM=electron npm run build. Open the index.html file with Electron: npm run electron.
 Cannot find native module
Most native node.js modules are loaded via node-bindings library. The library tries to find native module in build directory.
We need to copy serialport.node to build/. If you already have a prebuilt module in node_modules/serialport/build/Release/serialport.node just copy it: cp node_modules/serialport/build/Release/serialport.node build/.
If the module is missing build it with ./node_modules/.bin/electron-rebuild -e node_modules/electron and copy to build/ directory.
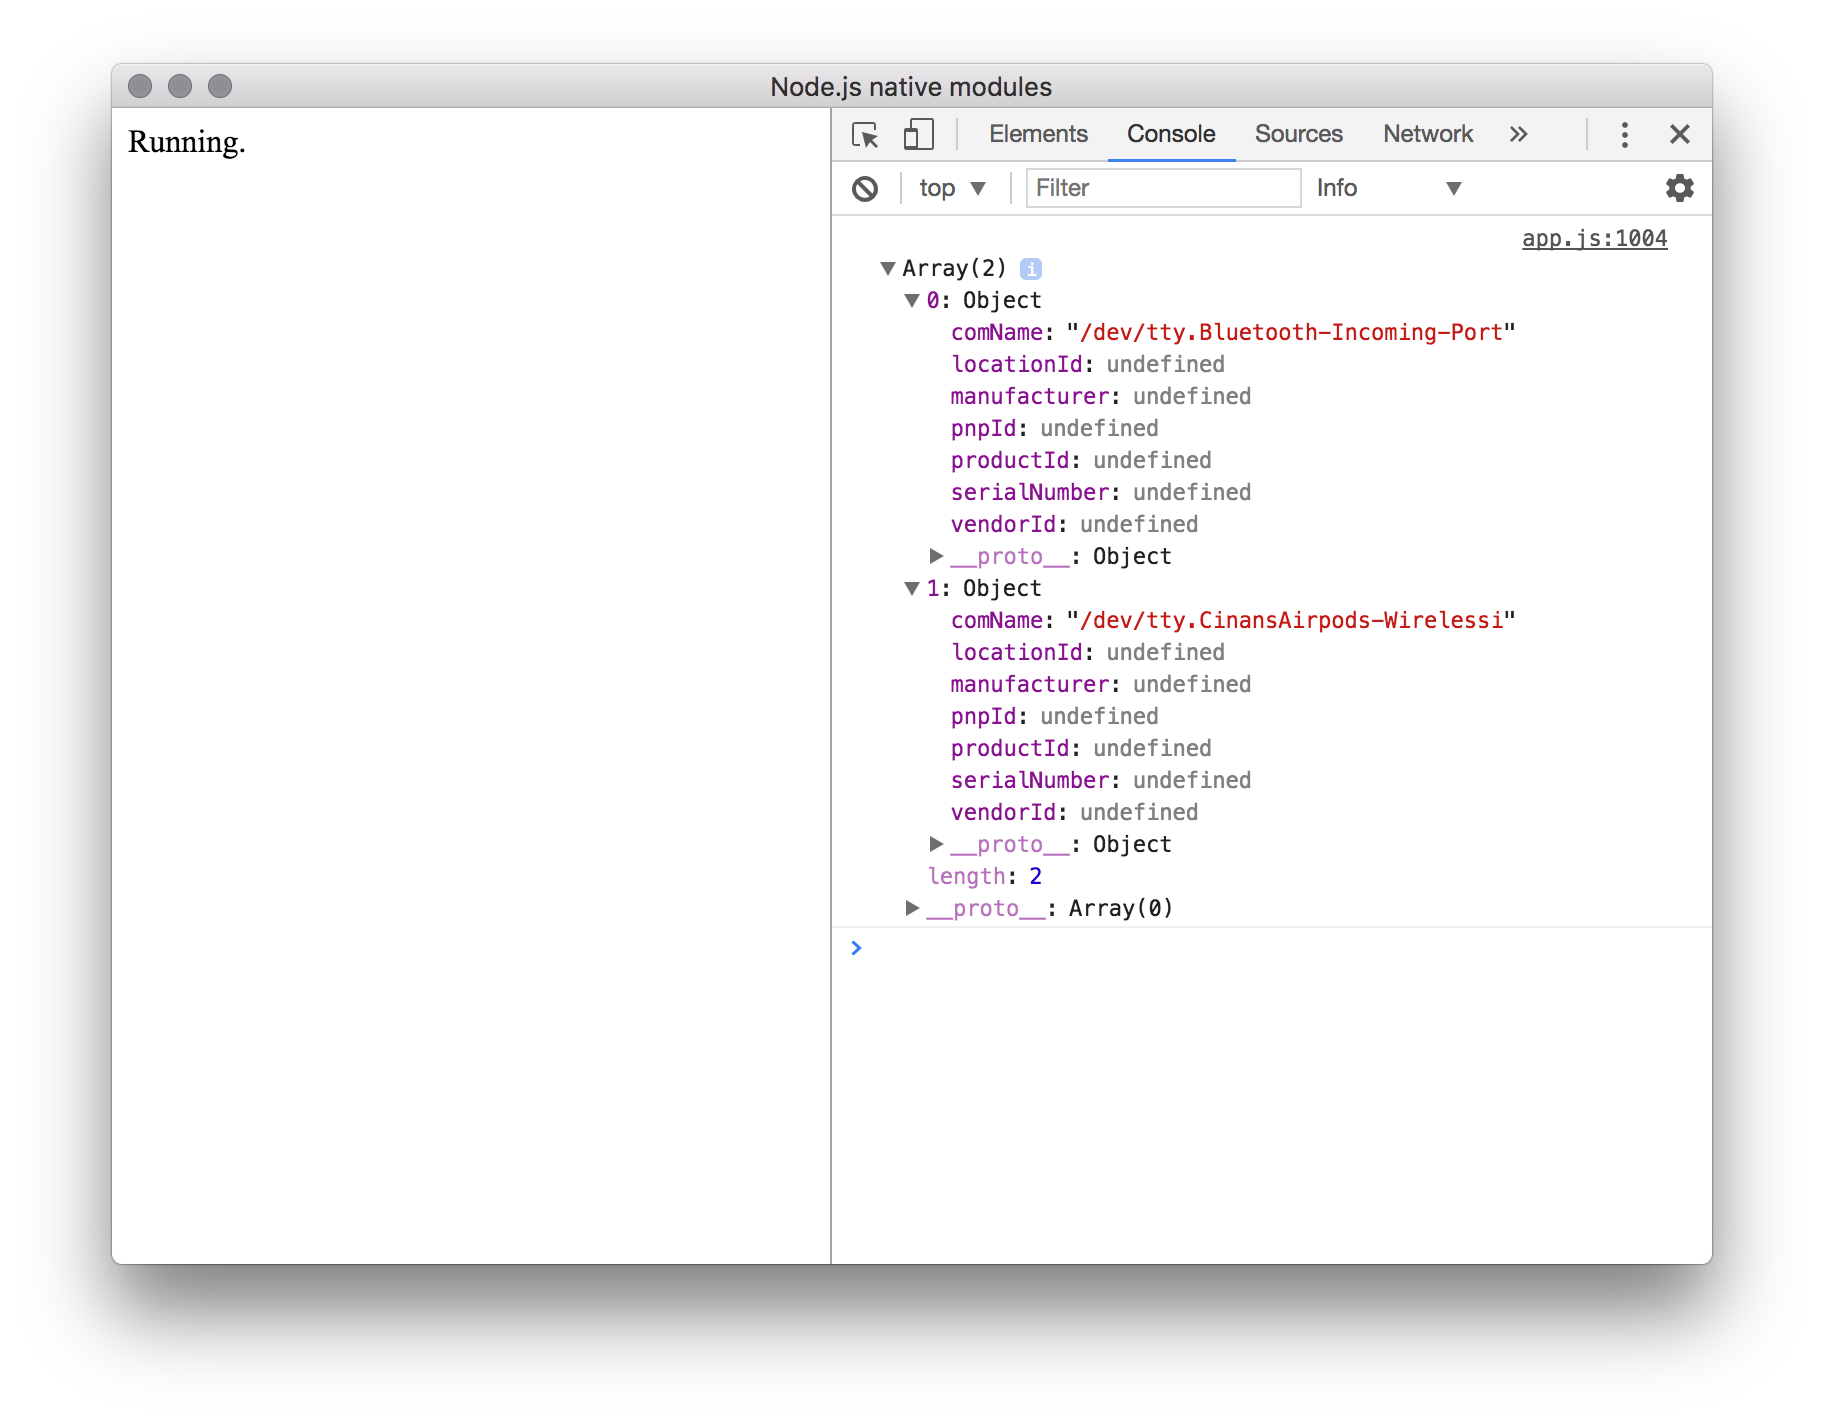
Try Electron again with previous npm command. Now you’re actually scanned your serial ports thanks to node.js native module!
 Native module in action
Living with two node.js environments
There’s a chance you’ll eventually see an error message The module ... was compiled against a different Node.js version using NODE_MODULE_VERSION X. This version of Node.js requires
NODE_MODULE_VERSION Y. In that case just run the ./node_modules/.bin/electron-rebuild -e node_modules/electron command. The reason why it might happen is Electron node.js usually slightly differs from the system-wide node.js version. In other words, Electron environment doesn’t depend on system-wide node.js.
My strategy is to keep native modules built against Electron in build/ directory and (if needed, because of tests e.g.) modules built against system-wide node.js in node_modules (use npm rebuild command).
Testing
Let’s write a simple test which actually require() serialport dependency:
1 2 3 4 | |
This will load native module in node_modules/serialport/build/Release/serialport.node and the test will pass. Run tests with npm run test.
What’s next
We can develop the javascript app (although very primitive) for both browser and Electron. In the next article we’ll pack Electron environment with javascript bundle into a ready-for-distribution executable package.